Red Dog and Me

This is an on-going dialog between me and a certain motor scooter, namely a 2009 Piaggio MP3 500 that came to live with me in October of 2009. I've named the scooter Red Dog and as yet have not determined its gender. In the past when I've named boats, bikes, and other like characters I've thought of them as feminine due to their behavior characteristics. Red Dog I'm not so sure about...we'll see. Update: OK, Red Dog's a girl...with an attitude

Wednesday, October 31, 2012

Central OR Inferno Day 01 – Aug 04 Bandon to Seaside


After months of non-activity I decided it was time for a tour on Red Dog. Other bikes and scooters have been getting in the way and the poor old scoot has been living in the dark under cover. With a break in my schedule August seemed like a good time to blow out of Dodge and I loaded up my gear and readied myself to set out. We’re having a record setting heat wave nationally but the Pacific NW hasn't been nearly as bad. Still we’re seeing temps that are reaching well over 100 degrees so I’m anticipating some really hot riding.

There was a bit of indecision as to whether to camp or motel it and without a destination firmly in mind I decided to pass on camping; finding a sleazy motel is often easier than finding a decent camp site. With that in mind I loaded up a pair of Ortlieb’s waterproof throw-over panniers with clothes and set out.

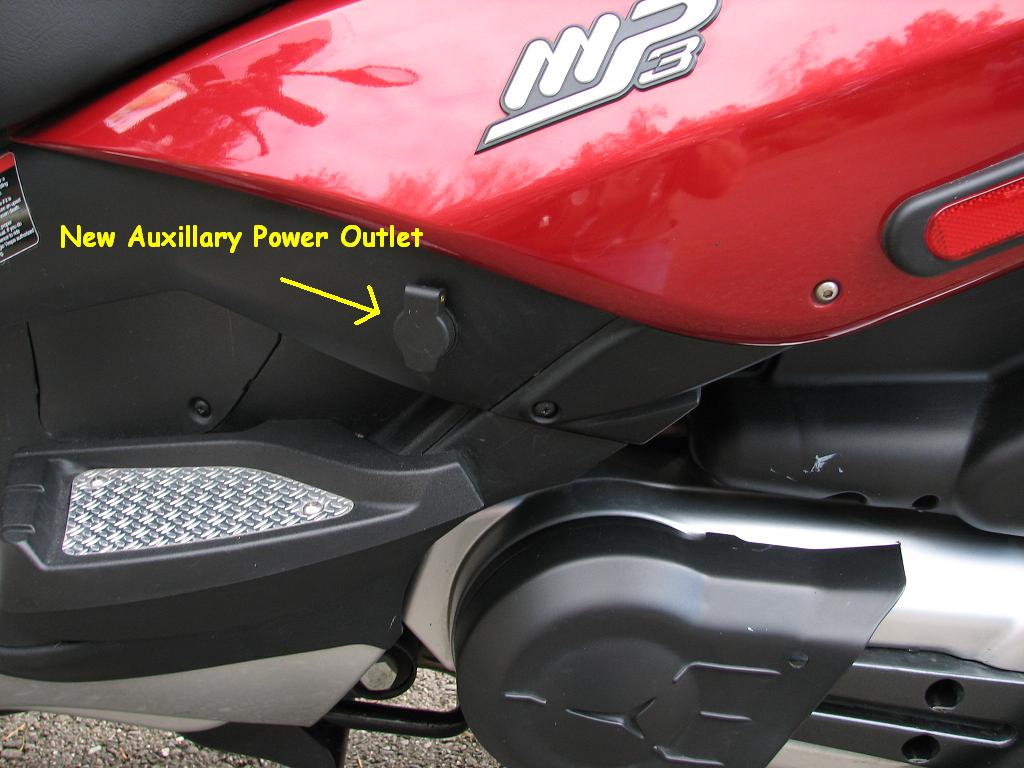
Note: Some of you who’ve followed Red Dog’s progress may recall the one-wheeled Uni-go trailer? It was a cool item for sure but a friend made me an offer I couldn’t refuse and since I hadn’t used it all that much it’s gone to live in another state. Hence the introduction of the Ortlieb panniers, lighter weight and I can carry almost as much stuff.


Ortlieb’s panniers are not very pretty but they’re totally waterproof which for touring is a big deal. Unless you like your undies soggy that is.

I managed to get a fairly early start, all loaded up and forgetting nothing off I go peddling as fast as I can…

I always like to stop at the truck scales south of town to see how fat my outfit is. Today I’m fat. Maybe it’s Red Dog? Yeah, that’s it, it’s Red Dog.
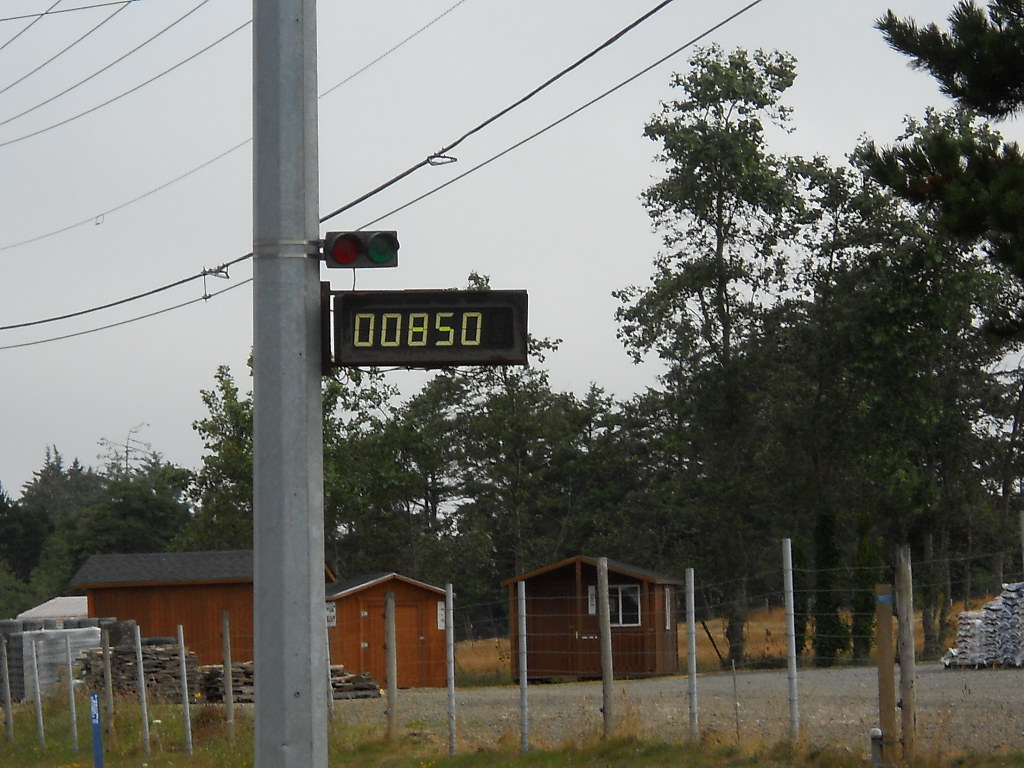
I am not fat!

The views along our coast are marvelous, the tourists thick as fleas on a dog in August and resulting traffic slow as expected. This was the sort of environment where a scooter excels, no shifting required resulting in an easy ride.

My first stop was a quick swing through Bullard’s Beach State Park just north of Bandon. It’s a popular place complete with a lighthouse and one of the best campgrounds you’ll find anywhere.

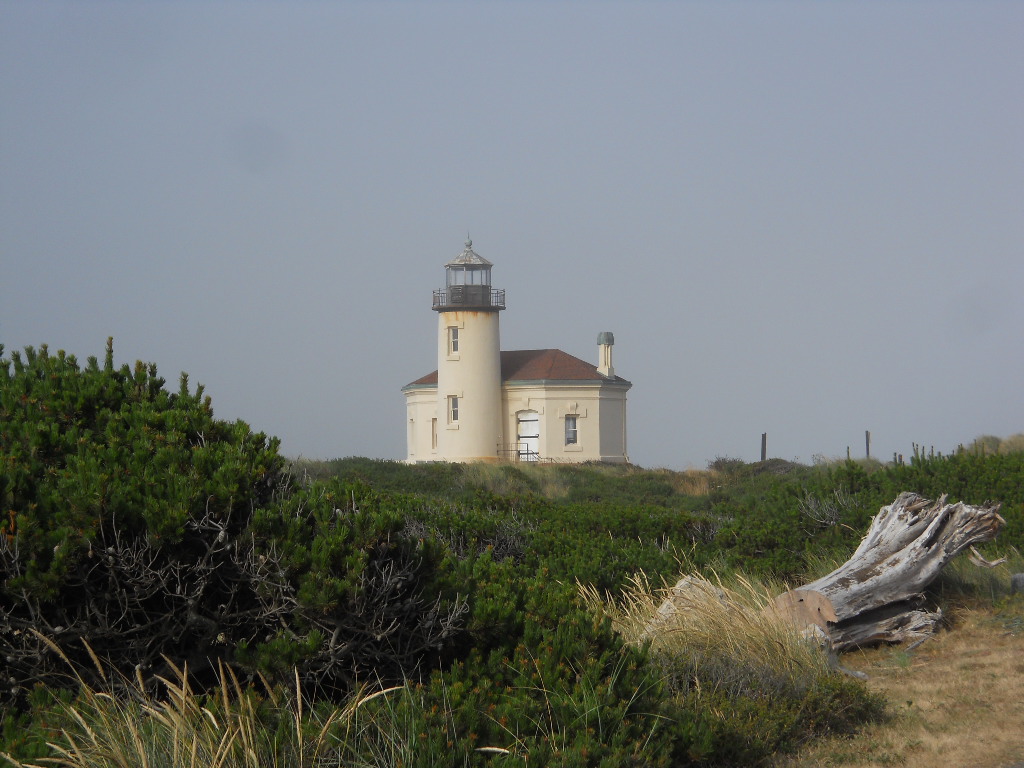
Here’s our very own lighthouse in its historic white livery. When it was repainted a few years ago the original white was discovered underneath layers of the more recent reddish brick color. Quite a row resulted among long-time locals who wanted to keep it painted red as opposed to the preservationists who insisted on accuracy. Damn good thing it wasn’t chartreuse… 


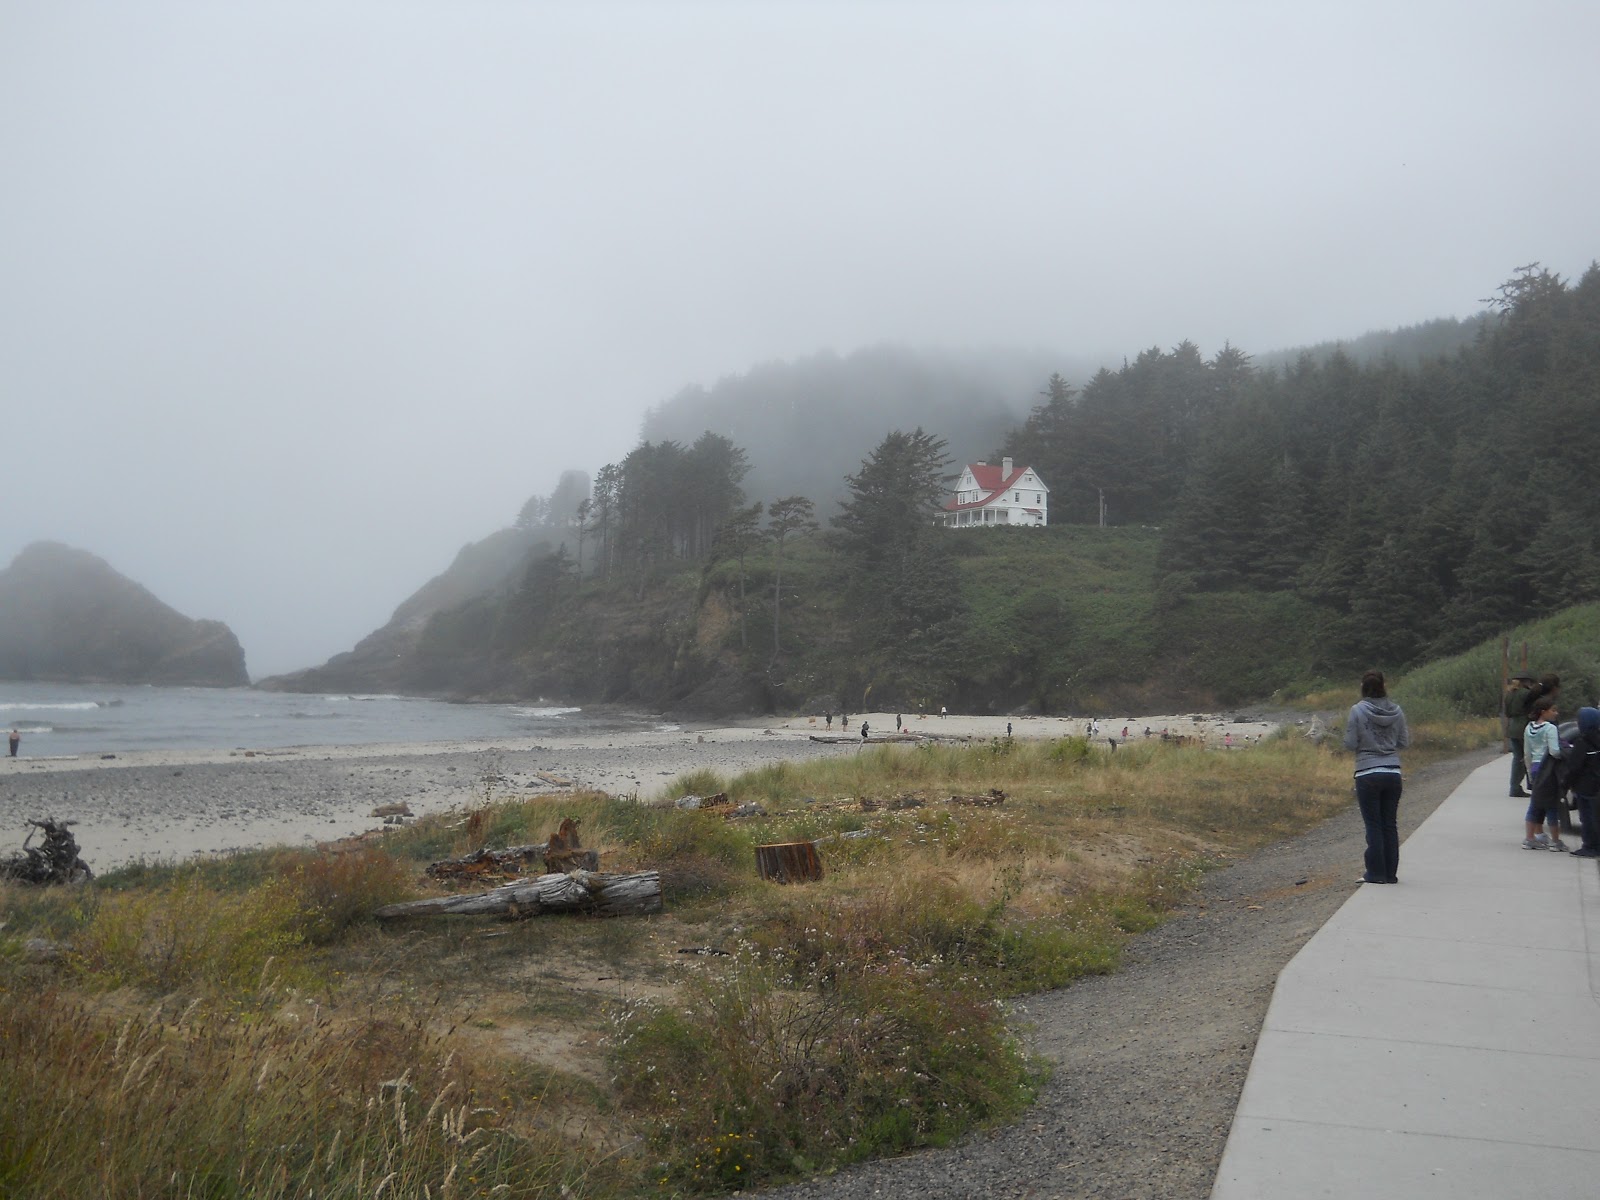
The shoreline near the lighthouse offers miles of lightly populated beach to explore, often uncrowded. This is likely due to our location; we’re a fair distance from major cities.  

Riding north through Coos Bay; then onto North Bend where the historic bridge takes you over the bay. The speed limit on the bridge is a mere 35 mph so travelers have lots of time to enjoy the view. Here’s the bridge from a different perspective than the usual calendar shot:

I explored the small road that leads underneath the bridge’s ramp. It’s beautiful down there, complete with a drive through a park; one I’d never seen before.

I met a guy riding his bicycle down there. He had a hard time understanding how Red Dog’s front end functions; a not altogether unusual thing. Since I was wearing my earplugs he had to do a lot of yelling and hand waving at me. I think maybe he was a bit mental so I moved on.


Just north of Reedsport another picturesque bridge crosses the bay. This view is looking south and you can see the small commercial development to the east of the bridge. A museum and some nice restaurants are located there; it's well worth a visit.


Pretty architecture

Florence was my next pause, time for coffee at one of my favorite places. You’ll see a lot of bikers there during the summer; it’s a really friendly community and the old town area has been nicely preserved. 


One of my favorite hangouts, good coffee and great cookies is the Siuslaw River Coffee Roasters place. The building has some interesting history and inside you'll find a lot of original fixtures still in place. They also have an outside patio overlooking the river; it's a great place for your morning coffee or lunch. 


Interesting bit of history

Coastal fog is ever-present in some areas. 

In years gone by lighthouses up and down the Pacific Coast were often the only means of off-shore navigation. Just mentioning that makes me wonder how you could explain that to kids busy with their smart phones? Nope, no GPS no smart phones, just maps and bad ones at that. Really. I’m not making that up; they really didn't have GPS back then…OK, I’m making it all up.

Cook’s Chasm is an interesting stop; it offers a unique bit of local history and photo ops for tourists.  Sea life is abundant nearby and people always comment on how nice it would be to live here. Maybe that’s why Florence has always been at the top of best places to live lists. 


Eventually I turned eastward following the road inland a ways. With no special agenda I like to see what comes up just meandering. Pacific City was ahead and I couldn't recall if I'd ever been there or not. It's supposedly a great fishing place and "Home of the Dory Fleet." I think dories are those boats that are pointed on both ends but I couldn't swear to it. Google it if you need to know.


So there I was, poking along at a snail's pace when I came upon an interesting stand of bushes right alongside the highway...

This looks like a good place for a rest break
Park the scooter...
Look both ways...dive into the bushes

After touring Pacific City I ride on to Clover Dale where I see bovines wandering around. Some of the older buildings are interesting, probably won't be around too much longer so take photos while you can. 


Besides visiting small out-of-the-way villages I had enough time to include a tour of the Naval Aviation Museum in Tillamook. I think admission was around ten bucks, a little less for old geezers. They nearly yawned when I mentioned I was a former Navy Airdale. In fact they did yawn. How rude. Zzzzzzz….zzzzzzz I'd been to the big museum in McMinnville where the Spruce Goose lives but never to this smaller one so it was a must see. Besides, I like blimps. Naturally there aren't any but you can fantasize.


Tillamook’s Naval Air Station blimp fleet was most active during WWII. After that it remained active for years, finally becoming a museum for USN Aviation history. I’m not sure but I seem to recall at one time the blimp barn was used as a hang glider training center. Students were to jump off the end of the barn as part of their training. No way Jose` sez I.


Map of all the old blimp terminals in the USA

Old military aircraft – many still operable – are stored inside the blimp barn. Most are owned privately and are flown for shows, etc.

Those old bomber guys were all art lovers. Class tells doesn't it?
The museum tour is self-guided or at least it was that day.

There were a lot of great aircraft to see 
More cool graphics...those bomber guys!
This reminds me of those "Wet Paint" signs

Check out the camels on this fighter’s fuselage. That’s a lot of kills. 

A lot of the display aircraft had been moved outside to make room for an upcoming hot rod show. Most of the regulars were on hand but I was told a number of them had been flown to other fields during the event.

This bad boy was far and away the biggest of the bunch. I might have gone inside but they nail you another three bucks for it and I was having an attack of the cheap. So I’m frugal, so what?


Fini

And that was that, a nice entertaining break for a walk down memory lane. Once done with the tour I rode north to Seaside where I popped for a hugely overpriced motel room. It was so expensive I must have gone into shock as I can’t recall what I had for dinner.  Tomorrow would be a change in direction.


Central Oregon Inferno Ride - Prolog - Aug 2012


Why do I always look like I'm having gas?

Writing a blog on motorcycle travel can be hectic at times and this trip would be no exception. The weather (as the title suggests) was often nearly beyond endurance and to make matters worse many of the photos were lost. This was due to an unscheduled drop of my notebook which destroyed the hard drive where they were stored, or so I thought. I'd all but abandoned writing a new chapter because of that but as luck would have it I was ultimately able to recover them. By the time I'd done so a lot of other things had transpired, the least of which was my return run to Mexico on the Ninja. Now that I'm home and semi-settled down it seems like a good time for updating Red Dog's files. 


Here you go...

LL

Tuesday, April 5, 2011

April 4, 2011 The Elusive Cruise Control farkle…

When it comes to cruise controls for motorcycles there seems to be no limit to design and function. For years there have been several “flip-over” models, all of which do little more than lock the throttle in whatever position it’s in when you set it. They’re inexpensive and for the most part seem to work pretty well; I’ve got one on my sidecar outfit and it’s been a blessing on long rides.
.
Releasing or cancelling the flip-over’s grip on the throttle is achieved by thumbing the control lever to the off position. For the most part these work OK but when it comes to hilly terrain they’re not much good. Imagine if you will the excitement of cresting a hill with the control set full on and suddenly you’re accelerating downhill with the throttle maxed…. Canceling the cruise setting can be a bit unsettling if not downright scary during those times.
.
Other types have come along that do a better job by incorporating easier shut off actions. Sadly all of those manufacturers warn against using their products on bikes equipped with heated grips. No one seems to know exactly why that is but I suspect it has something to do with liability, maybe those devices wear through the heated grips or something.  Of course that’s one of the most desireable options so naturally Red Dog is outfitted with Hot Grips.

Go Cruise Throttle Control

Recently  one of the MP3 forum members posted a link to newbonneville.com, suppliers for a product called Go Cruise Throttle Control. Like many designs it’s simple as can be, works sort of like a clothes pin gripping the bikes throttle control. 

Mounted on Red Dog
The thing that sets it apart from the flip over type is part of the unit sticks out over the front brake lever so when you pull the brake it slides the throttle control back to a reduced speed.

Hey it even works when you're not on the bike!

This concept sounded like a good idea and I figured for the relatively low price of $27.94 delivered I had to have one. It turned out to be a slick device that seems to work pretty well. About the only drawback I’ve encountered on Red Dog is it’s possible to set the throttle and then start the engine. On an MP3 that's not a good practice as the front end unlocks at certain speeds…

Those who are familiar with that model will appreciate what might happen to anyone not paying close attention. I didn't drop Red Dog but I was fairly busy for a few seconds. Woo Hoo!

March 30, 2011 Red Dog’s Saddle – One more time

In February of 2010 I made the long journey to Rich’s Custom Seats way up in Kingston, WA. The round- trip from Bandon clocks just under a thousand miles which makes it a bit of an adventure if you’re riding a scooter. I chose to trailer Red Dog behind the RV as you never know what you’ll encounter. Like Zombies maybe...


Beautiful Leather but too slippery for Red Dog
Besides, it was February and camping doesn’t appeal to me when it’s nippy out. When the new saddle was all done up in gorgeous leather & tri-color stitching I headed home to Bandon and it was still raining hard.

A couple of days later the sun finally popped out for a brief time and I was able to sneak in a short ride of 100 miles or so. The new saddle wasn’t quite what I’d hoped for although the back rest felt pretty good. The problem with the saddle was simple: That gorgeous leather surface was slick as a whistle and I found myself sliding forward about every 11 seconds unless I hit a bump and then it was immediate.
.
This resulted with my being thrust into a laid-back slouching position, the kind I usually assume when I watch the tube. While that may enhance TV viewing it really doesn’t do much for piloting a motor scooter as I was continually having to push myself back to a more upright position. Remember your Mom yelling at you "Sit up or you'll get a crooked back!" Every 11 seconds kids, not good.
.
Figuring this must have happened to others I queried the members of the MP3 forum I frequent and a number of suggestions were proffered, the most common one being to raise the front of the saddle by installing shims under the front hinge. I tried this method and it helped somewhat but it still needed something more. The bad part of this solution was the saddle now allowed water to enter along the raised part which flooded the under-seat storage area.
My next step was to contact Rich O’Connor the owner of Rich’s Custom Seats to explain the dilemma I was in. He suggested sending the seat back and they would make some adjustments to it and return it to me. That sounded like a better idea than driving back up so I packed it and shipped it off.


Rich looked it over and performed a few tweaks on it and shipped it back. It was a bit better but the sliding continued and on rides of any duration it was still pretty miserable.


Thinking maybe I needed to sit differently on a scooter I decided to live with it for awhile to see if I could adapt. Months went by and instead of taking Red Dog on my 2010 summer tour I left her in the barn and went with a different rig, a new Kawasaki Vulcan 900L.


When I returned in late summer I once again turned my attention to making Red Dog into the grand touring machine I felt she was capable of being. Over the course of the next few months I tweaked and fussed and messed with all sorts of ideas about where to ride her and how long I’d be on the road, etc. Still the moderately high level of discomfort of the saddle haunted me and I decided the only solution was to have the cover redone in a non-skid material. I again contacted Rich’s and after discussions they mailed two samples of material they thought might resolve the issue.


One sample was a bit heavier than the other which meant it would wear longer and the other had a much courser surface grain which would provide the most resistance to sliding.


Super non-skid vinyl
I chose the latter; I wanted the problem to go away for good. It was time for the return run to Kingston, WA. 

Ready for the return trip to Rich's Custom Seats

On Tuesday March 29th I loaded Red Dog onto the bike trailer and headed north, stopping in Portland for an overnight visit with friends.


As a side trip I'd also scheduled a meeting with the Aussie Rescue people in Molalla, OR. We’d recently lost Daisy, our 13-year old Australian Shepherd and it was time to start looking for another one. There are an amazing number of homeless dogs in the world and our place is perfect for a couple of them.


The Molalla agency turned out to be a good call; the dog I’d been scheduled to see was fine although way too jittery for my liking but while I was there they brought in another candidate, a one-year old male Aussie. He’d just arrived back at the shelter that day after spending 4 days on a trial period with a potential family. Evidently it didn't work out for them but I liked him right away and in less than two hours we were on our way to Portland.

What a happy face!
They say that traveling with someone is one of the best ways to find out how compatible you are. Toby and I spent the next few days bumping along in the motor home and we soon discovered we like each other.


* Update note at home: Contrary to what I'd been told he isn't house broken and his pretty wary of kids, especially 6-year olds like our granddaughter. The question of cats is still out there as we don't have one right now. None of the above items are deal-breakers, Toby's already worked his way into our hearts and he's found a home.


Back to the story about Red Dog's saddle redo. We camped that night on the parking lot of a small office building in Portland and in the morning we set out early for Kingston. The drive north was easy, barely 250 miles and we arrived at Rich’s right at lunch time.


They have a small RV area for out of town customers so after off-loading Red Dog I set up camp. Rich's facility is better than nearly any campground you’ll come across and he lets you stay there free while they work on your bike. Service like that is practically unheard of, isn’t it?


That afternoon they took the scooter right in and began work on redesigning the saddle. Rich’s goal was to reshape the underlying foam material into a new base with a higher rise to the front.

Tear it apart & start over


Checking the fit

He also wanted to see if we could save the leather cover but it was no use; for this particular application it was just too slippery.

Rich returning from one of several test rides

Cutting the pattern for the new cover
After shaping and reshaping and multiple test rides he decided to give it up and go with a totally new cover, this time using the vinyl with the super sticky surface. Both of us hated to see the leather go but sometimes even the best laid plans…

Antonio sewing the new cover
 Antonio, one of Rich’s key employees did a lot of the work with Rich doing the design changes and critical cutting of the foam. Antonio handled assembly and sewing of the cover which he made using patterns he created from the foam base.

The new saddle ready to ride
 The whole process took hours, all of the rest of Wednesday and with an early start on Thursday they finished mid-afternoon. It was raining when it came time for me to do the test ride, the same as it had been doing last year only this time I was determined to pay very close attention as to how well it fit me and whether or not there was any tendency to slide around.


I donned my one-piece Roadcrafter which is a super rain suit, added helmet and gloves and headed out. The rain was coming down fairly hard but it was easy for me to feel the difference; this time the saddle felt like everything it should be, comfortable fit and no sliding around whatsoever. I headed back to Rich’s shop and gave him the thumbs-up sign, we were finally done.


It was nearly 3:00pm by the time I got Red Dog reloaded and all strapped down for the run home. We were planning on another overnight stay in Portland and then would make the final 250 mile drive to Bandon. Everything went smoothly; we arrived in the late afternoon on Friday without mishap.


This has been one of the longest on-going projects I’ve encountered with Red Dog and certainly the most expensive. It was an essential one though and I’ve learned a lot during the process which will serve me well should I ever require another custom saddle. And I can truthfully say that any future saddle work I have done will be at Rich’s Custom Seats; their level of customer care is the best I’ve ever experienced. FYI - http://www.richscustomseats.com/

Overall this has been a great trip, I came home with a much improved saddle for Red Dog and a new Aussie Shepherd pal. What more could you ask for?


PS – This part is just for fun: Besides being a skilled saddle maker Rich’s interests range far and wide when it comes to military collectables. One of his many on-going fun projects has been the creation of a sidecar rig using a bomb shell for the sidecar. Sure, it’s an old kiddy car but isn’t it great?

Bombs Awaaaaay!


Monday, April 4, 2011

March 24, 2011 Auxilary Power Outlet

After only a year and a half I’ve finally gotten around to installing a power outlet that I can plug my battery charger and new electric vest into. I’d already installed a controller for my old vest but last year I had to buy a replacement as my original one went kaput just before I was to leave on tour.

The Auxilary Outlet installed


All of this may sound a bit fuzzy but the bottom line is the two vests require different outlets and their respective cords are on opposite sides.
Think planned obsolescence and you’ll get the picture.
I chose to mount the plug just below the main body panel where it’s convenient to connect the vest. You’ll need to drill one hole in the plastic panel for this purpose.

To begin the wiring process you must first select a point where you can tap into the bike’s 12 vdc power system. For this application the nearest and most convenient spot was the backside of the power plug located underneath the saddle.

Back side of power outlet underneath saddle exposed

To access the back of the power plug you need to remove the left side plastic body panel. This exposes the interior light which you can see lit up in the photo and the plug which is located to the left of it.
Power to the plug-in is on all the time so it is necessary to remove the 15amp fuse located in a fuse panel just to the rear of the battery. The panel is located in the under-seat storage area which makes it a simple task.

Once the plug has been powered down you can roll the weather proof shroud down that covers the back of the plug. This exposes the two wires feeding it which you can use as a point to tap into. Using a #1 Exacto knife I carefully trimmed away ¼” of insulation on each wire; then wrapped the two new wires onto each and soldered the connections.


When finished you need to wrap each one with electrical tape and then pull the weather proof shroud back over the connections and plug. Don’t forget to re-install the 15amp fuse when you’re done. You can see in the above photo the lead wires hanging down from the plug, ready to connect to the new Auxilary Power Outlet.

New Weatherproof Power Outlet

I bought my auxilary power outlet from Aerostich Riders Warehouse but they’re also available at electronic suppliers; just make sure the one you choose is weather proof and of high quality.


While I was doing this project I also ordered a right-angle male plug to use with the new outlet. This makes for a tidy connection that doesn’t stick out as far and also helps keep  the vest's power cord from flapping in the wind.


Right Angle Plug with 2-wire connector
The right-angle plug came ready for hook-up so I shortened and connected a standard two-wire “flat trailer connecter”, available at auto parts stores. This plug is compatible with my electric vest, Battery Tender, and tire pump.


The amount of time required for the project was only a couple of hours and as you can see in the photos it makes for a very sanitary look.


New Auxillary Power Outlet

Weatherproof cover is spring loaded

For those who are interested here’s a link to AeroStich Rider Warehouse.
If you spend money there tell Andy he owes me big time. http://www.aerostich.com/catalog/US/index.html